- 349
- IGN
- videogamesm12
Introduction
The Replay Mod is a mod for Minecraft that records all packets sent and received by the client during a session and saves it in a small, lightweight format that could be played back later on with anyone's computer provided they have an environment similar to what was used to record it in the first place. Though there were early attempts to utilize it on the server in late 2017, adaptation on a larger scale didn't take place until early 2020 onward when admins began installing it in their instances for use as a server equivalent of police bodycams. This was made easier by the fact that the mod by default recorded all server sessions automatically in the background without requiring user intervention. I began to use it in early 2020 and recorded almost every single session of mine on the server where possible. Replay recordings were considered acceptable and convenient forms of evidence in cases like indefinite ban requests and ban appeals.Around the same time I began to adopt the mod in early 2020, Mosley informed me of a trick he learned where it was possible to use a world downloading mod in conjunction with the Replay Mod to extract the chunk data from recordings during playback. This wouldn't be able to capture any data from specific tile entities like chests, barrels, or shulker boxes (the client never receives such information unless it specifically asks for it), but it would preserve pretty much everything else. This trick and its derivatives were later used to recover world data and create schematics of builds that were lost due to griefing incidents, world wipes, or explosive server shutdowns.

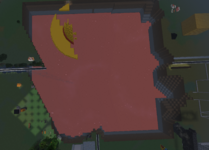
Example of serious untraceable grief of the Flatlands, which could not be repaired using conventional means like CoreProtect

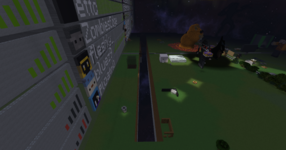
The same general area as it was finishing being restored using the schematic repair method,
which proved to be a complete success, despite the immense damage shown above.
For this example, I am going to use parts of Lyicx's plot from the original server as part of my demonstration. Videos demonstrating the two documented methods will be included at the end of their respective sections.For the past 3 years, I have been using a mod called the Replay Mod to record my sessions on the server. The mod records a variety of data sent to the client, including world and chunk data. It's one of the most useful mods I have ever used.
I have discovered a method to recover entire builds using my massive stockpile of recordings and save them as WorldEdit schematics, and with the current lack of an official world download for the original TF, I've decided to put my massive collection to good use to recover people's builds.
If I have ever teleported to you on the original TF or visited a warp of yours, I will be able to recover most if not all of it, even if you never saved it as a schematic on the original server. Contact me on Discord for more information.
Preliminary Requirements
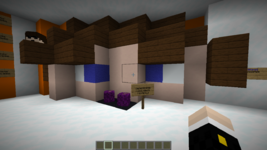
This is a rather involved process. You need to have recorded the general area you are trying to recover at least once and have a passable bit of knowledge or reference for when you may have visited the area you are trying to recover. Log files and screenshots are great ways to find out when you may have visited an area, as they are timestamped and can be used to find the exact replay recording containing the world data using some simple guesswork. In my case, I had a screenshot taken of a specific part of Lyicx's plot where he showed his weird gay fantasy of having his balls in my mouth, timestamped August 16, 2023 at 4:45 AM MDT.I had four replay recordings from this day. Because of the file names, I was able to narrow it down to the one that started 5 minutes prior.
Depending on the size of the build and the render distance of the server, you may need to use multiple recordings and stitch them together where necessary. Typically, this isn't necessary unless the build was massive. Now that you have the recordings and a good idea of where in the recordings you should begin, we can then begin the process of recovering a build. Make sure to copy the replay recording to the instance you are going to be using to recover the build with by copying the MCPR file to the instance's
replay_recordings folder.Method #1 - WorldTools and WorldEdit
This first method uses the WorldTools and WorldEdit mods to extract the world data, save it as a singleplayer world, and then save the build as a schematic. This is a great way to recover builds as it doesn't require you to know exactly where the build begins and where it ends when it comes to boundaries. Open the Replay Viewer, scroll down to the relevant replay recording, and double click the entry to start playing back the recording.NOTE: If you are using multiple recordings for this method, start with the earliest recording first and repeat this process in sequential order. This will ensure that data not present in one recording will be stiched together with data present in another without losing data.
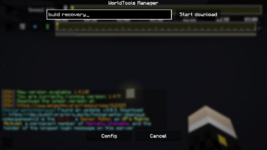
Right when it finishes loading the recording, open the pause menu and click the WorldTools option. When it prompts you for a world name, give it an easily recognizable name like "totalfreedom" or "build recovery" and click "Start download". The mod will begin saving any chunks that it loads in from this point in the background. Click the play button at the top left corner to resume playback, and then just let it play like normally. If you would like to speed up the pace of the recording, use the slider to increase the playback speed.
Once you've reached the build you want to recover and are confident that it's as loaded as it can be, open the pause menu again and click the option that says "Save capture of <whatever you called it>". The mod will write everything it captured up until that point to disk. Once that's finished, open the F3 menu and write down the coordinates of where you are currently at and if applicable, the internal name of the "dimension" (which in my case is
minecraft:plotworld). Now that you have the name of the dimension and the location of the build written down, exit the playback session and load the freshly created world in singleplayer.You should spawn in right where you started. With the dimension name and coordinates you just wrote down, execute a command like
/execute in <dimension goes here> run teleport @p <coordinates go here>, substituting where necessary. In my case, the command would be /execute in minecraft:plotworld run teleport @p 7589 63 7717. Once you've teleported to the build, you then get a wand and do what you would normally do to make a schematic if you were on a server. The schematic will then be located in the path .minecraft/config/worldedit/schematics.Method #2 - Litematica and (optionally) Lite2Edit
WorldTools is a great method to save builds, but it isn't perfect. The mod is only available for a couple versions of the game and hasn't been updated since 1.21.4. However, there is an alternative route you can take utilizing a mod called Litematica. Open the Replay Viewer, scroll down to the relevant replay recording, and double click the entry to start playing back the recording.NOTE: You may notice while attempting to use Litematica that it may not respond when you press its keybinds while playback is paused. This is a strange bug likely caused by how Replay Mod "pauses" the recording. Briefly unpausing and re-pausing should temporarily fix the problem.
Wait until you get to the build in the recording (speed it up if necessary) and then pause the playback. Go to a corner of the build and press the key bound to open the Litematica menu, which in my case was M. A menu will come up asking you what you want to do - click the Area Editor option. In the area for Corner 1, click the Move to player button to set the first corner to your current position. Close the Litematica menu and go to the exact opposite corner (both horizontally and vertically). Open the menu again and repeat the process for Corner 2 instead. Close the menu again and make sure that the white box covers the entire build and that there's nothing jutting out. If there is, manually adjust the X and Z coordinates using the buttons right next to each corner's until you have gotten something satisfactory. With the area selected, it's time to create the schematic.
Open the menu again and in the Area Editor, click "Save Schematic". It'll ask you what you want to name the schematic, so give it a unique name and click the Save Schematic button. The mod will queue up a saving task, so unpause the recording so that the queued task actually goes through and then once it's done exit the playback session. The Litematica-formatted schematic will be located in the path
.minecraft/schematics.If you want to convert the Litematica-formatted schematic into something that WorldEdit can understand, you will need an extra tool called Lite2Edit, which can be downloaded here. Download and run the JAR file from the latest release and click the Browse button. A window will pop-up asking what files you want to convert, so navigate to the aforementioned path and select the schematic you want to convert, then either double click it or click the OK button. The program will make a converted copy with a
.schem file extension in the same folder as the original schematic.
Conclusion
Congratulations, you have recovered your build entirely on the client-side without issue and can now do whatever you want with it, including repairing completely annihilated chunks of a build like as if it never happened. I wanted to share this knowledge because I'm not sure many people really know how to do this, and I think it would be beneficial for everyone to know, especially since it will save you eventually.Thanks for reading.
Last edited:


